Day 2
Day 2:
Does git sound familiar to you?
😯 I don’t have a clue
👍 I’ve heard of it
👏 I’ve used it
❤️ I use it all the time
Choose an emoji from Reactions
/home/pao/Documents/thesis
├── abstract.R
├── thesis.Rmd
├── thesis_reviwed.Rmd
├── thesis_reviwed2.Rmd
├── thesis_final.Rmd
├── thesis_finalfinal.Rmd
├── this_is_it.Rmd
├── now_this_is_it_for_real_this_time_i_swear.Rmd
└── FINAL.Rmd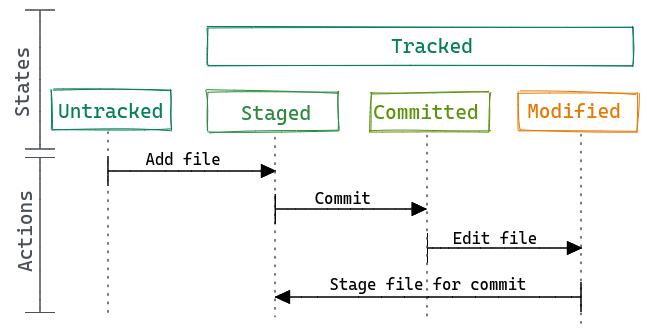
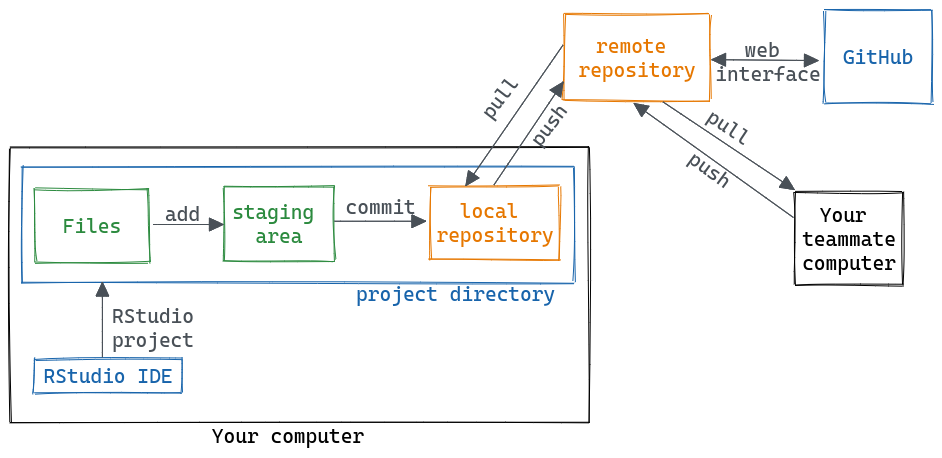
Branches: main
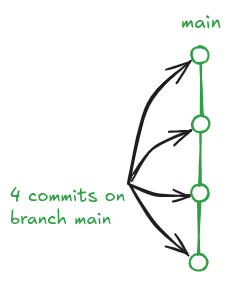
Branches
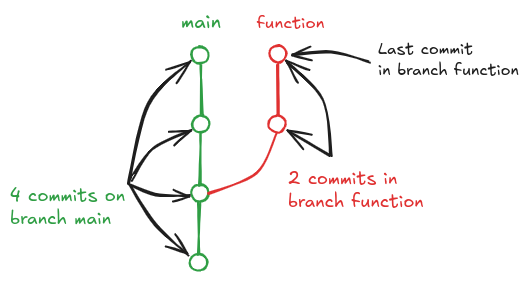
Scenario 1
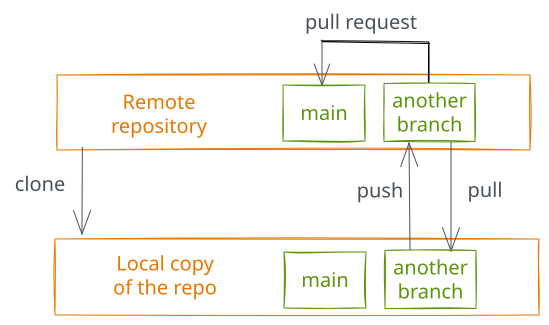
Scenario 2
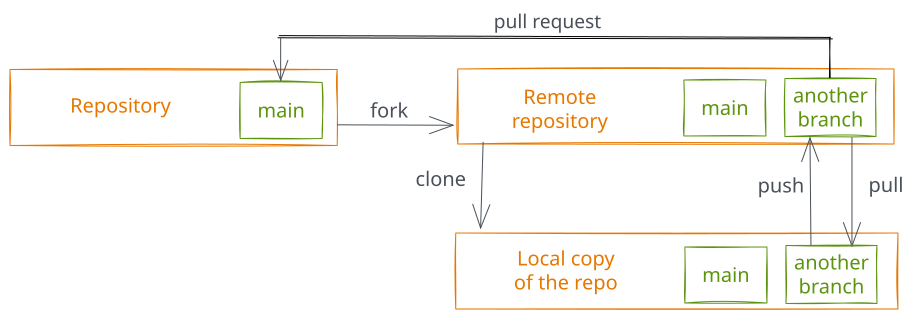
Research compendia
- Folder structure
- Specific files that document the project
- Code and analysis structure
- Code documentation
- Working environment
- And more
This is what we usually use
research_project/
├── .gitignore
│
├── analysis
|   ├── paper.qmd       # this is the main document to edit
|   ├── references.bib  # this contains the reference list information
│   └── paper_figures   # location of the figures produced by the paper
│     └── 01_plot.png
│
├── data/
│   ├── raw/            # data obtained from elsewhere
│   └── derived/        # data generated during the analysis
|
├── LICENSE
├── R
│   └── add_numbers.R   # R functions
└── README.md
Document your project
Readme files. Use a
README.mdfile to explain what your project is, and how to use it.License. The license tells people how they can use the content of your repo. Examples are the MIT Licence or Apache. Some extra resources:
Contributing guide. A file called
CONTRIBUTING.mdand guidelines for contributors so they know what they should do if they want to help you out.Code of Conduct. Good projects have code of conduct to make sure that people are treated well.
Preparations for day 3:
- Portable file paths with here
- Install the here package.
- Managing R dependencies with renv
- Make sure you have the renv package installed.
- Sharing your data
- Create an account in sandbox.zenodo.org/